Uploading Large Directories Using Swift Explorer
This brief tutorial-like post details how one can upload large directories with Swift Explorer. Especially, some practical hints on how to deal with unexpected interruptions are given. Indeed, uploading a large set of potentially oversized files is time-demanding (e.g., several dozens of hours are far from being uncommon), and it might be challenging to sustain the network connection over such a prolonged period of time. For example, you need to turn off your computer (or your computer turns itself off, due, e.g., to some hardware failure), or simply because the network connection lacks stability.
![]()
Basic Operations
This should be fairly intuitive to most of the users. First, select the container and the destination directory. Subsequently, in the main menu StoredObject, select Upload Directory (alternatively, you can right-click on the destination directory and select Upload Directory in the pop-up menu). A directory chooser dialog is then opened, enabling you to select the source directory.
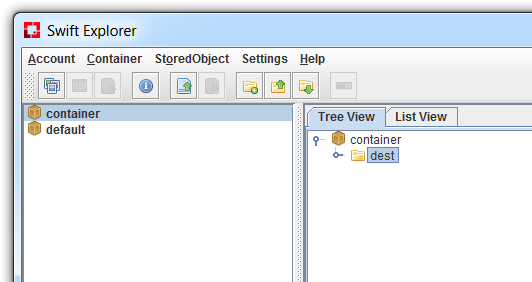
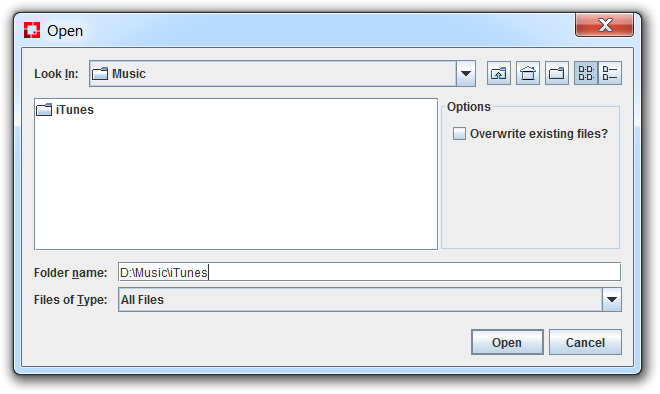
In the example depicted by the two screenshots above, the directory iTunes will be uploaded under the directory dest, which is contained by the container named container.
How to Resume an Interrupted File Transfer?
The transfer can be quasi-resumed. The entire directory can simply be uploaded again from scratch (to the same destination). The files that are already on the remote storage will be ignored (i.e., not be uploaded again).
Let’s stress that there is no need to manually determine which files have already been successfully transferred and to select only the ones that remain to be transferred.
How to Update an Already-Uploaded Directory?
Let’s consider a scenario in which a large directory was previously uploaded; and since then, some files have been updated locally, while some other files remain unchanged. In order to conduct a one-way synchronization, that is, to upload only the files that were modified to overwrite the existing out-of-date copies in the cloud, you can upload again the entire directory by selecting in the source directory selection dialog the option overwrite existing files (as illustrated in the image below).
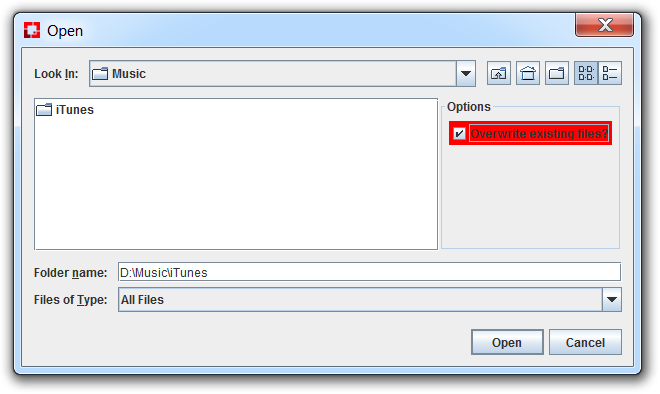
What exactly overwrite existing files does? If the option is not checked, then if a file already exists on the remote storage, nothing is done (this is for resuming an interrupted transfer - as suggested in the previous section, or to transfer new files that were added in the local directory only after it has been uploaded).
If the option is checked, two cases must be distinguished when a file exists: If the local version of the file differs from the remote version, then the file is uploaded again and overwrites the remote version. Conversely, if both the local file and the remote file are identical, then nothing is done.